
Hello beauty lovers, welcome to Elegant Ageless Beauty.
I adore anything to do with nails! So surprisingly this is the first nail product review I’ve done on EAB for a long time. I was recently sent a lovely “Try Me” kit from KLM Beauty to try and then review here on my blog. This is the Microcell Nail Repair Try Me Kit.

From the right hand side of the picture is the “hero” product in the whole kit the Nail Repair itself. It’s a 4.5ml of product which is designed to repair and treat the nails. It’s amazing for dry brittle nails, helps to prevent splitting and peeling, and peeling is the problem that I’ve always had with my nails. But since using Microcell Nail Repair my nails are beautiful, I am so happy with them. Nail Repair is also designed to accelerate growth, and guess what? It truly has helped me get my nails looking fabulous in ONE MONTH! This how Microcell suggest to use the treatment.
Application of Nail Repair: Apply one layer of NAIL REPAIR on two consecutive days. On the third treatment day remove all varnish layers with NAIL REMOVER REPAIR and repeat the treatment as on the first and second day. The treatment should be carried out for 2 – 3 weeks. Then it is recommended to use NAIL REPAIR weekly as a base coat.
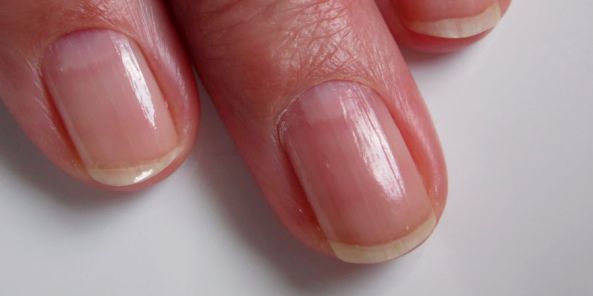
This is a picture of my nails on the first day of using my Microcell Nail Repair Try Me Kit.
The bottle of pretty nail polish in the shade Raspberry Kiss, is not just any old nail polish, this is the Colour and Repair, a quick drying varnish which will also strengthen the nails. Colour and Repair is enriched with silicon and also has calcium, green algae and a unique Diamond-Gloss in there too. I applied one coat of the Colour and Repair to my nails during the second week of using the treatment. I applied it to bare nails without Nail Repair on. It does apply beautifully and quite opaque that I only needed the one coat.
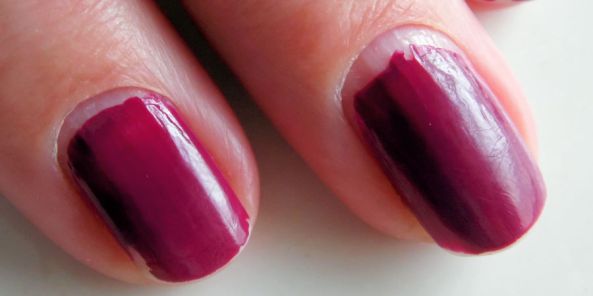
This is my nails with Raspberry Kiss Colour and Repair after one week. It didn’t chip at all, in fact I saw regrowth of my nail, as you can see in the picture. I do want some more colours of the Colour and Repair varnishes, there are some really pretty shades in the range too. The third cute little try me is a 4.5ml bottle of Nail Wonder, which is a 5 in 1 “wonder product” as a quick drying top coat, a colour refresher, a smoothing ridge filler, protects against peeling and/or chipping and also protects against dehydration. Yes it works as a quick drying top coat, I was touch dry within 5 minutes and it gave a very shiny finish to my nail polish. During the week I added a coat of Nail Wonder just to refresh may manicure, it works for that too! A wonderous product, for me.
Lastly in my try me kit is the bottle of remover. “The NAIL REPAIR REMOVER 50ml – An acetone-free polish remover which works in synergy with NAIL REPAIR and is suitable for all nail types but is especially effective on weak, fragile nails” I LOVED this! It leaves my nails “squeaky” clean when I removed my polish, without leaving them dry.
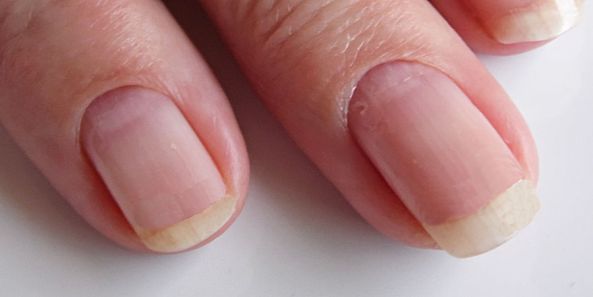
This is my nails today! I have been using my Microcell Nail Repair Try Me Kit for a whole month, and this is the result that I have. I am loving my nails again, for me this is going to be my new holy grail nail treatment. I shall be using the Nail Repair as a treatment once a month for a week, then as a base coat for my colour.
Purchase Microcell Nail Repair Try Me Kit HERE. I shall be purchasing the Nail Repair Beauty Kit myself, which is the Nail Repair treatment in full size and the remover in full size, and right now they are on sale until end of September, while stocks last.
Thank you to KLM Beauty for letting me try these fabulous products. Click to see more HERE.
XXX
![]()


